Hello again. I am back from a year in France and have decided to revive my project blog. I have my mind set on two new projects. One is a small robotic hexapod that uses muscle wire, and the other is a large scale art project that will turn the area outside Georgia Tech's student center into a large koi pond.
How am I going to do these? Here are some details on each:
Hexapod
The hexapod I will be creating will be small and relatively silent. The idea of using muscle wire comes from wanting a low-cost solution. Additional advantages are that it will be completely silent, as opposed to the far more common servo models. My Perspective and Robotics class, taught by Dr. Mike Stilman was what first sparked my real desire to build a hexapod for myself. This project would allow me to explore and model various motions and gaits. The hexapod structure is already well known for being a simple platform to start with as it is intrinsically stable. As I began to research hexapod designs, however, I discovered that any prefabricated designs were going to cost me upwards of $500 at the cheapest. I resolved, therefore, to build my own.
My hexapod prototype will be controlled with an Arduino Mini 5V microcontroller. The muscle wires themselves will be powered through a 9V battery (the Arduino cannot provide enough current itself). For the body of the hexapod, I am planning to use laser-cut polycarbonate. Each leg will have two degrees of freedom. This will be enough to allow forward, reverse, and turning motions. Using two instead of three degrees of freedom on each leg does remove the ability to walk sideways. Right now I am attempting to develop a body and leg design that could allow sideways motion through sliding and shifting of the center of mass of the robot.
Koi Pond
I have long been interested in large artwork, as shown by my footprint stencil project. I did attempt initial work towards a large koi pond, but found that the clear plastic I was using was impossible to see and too flimsy to really work with. In my new attempt, I am going even bigger than before and have ordered a 10' wide and 25' long sheet of black .006" thick Polyethylene film from McMaster-Carr. I plan to place three large fish done in spray chalk around the student center by the end of this semester. For this project I will need to document the square footage to spray chalk ratio for the recipe I choose to use.
As I work on designs towards these two projects, I will post the progress here. As soon as parts arrive, I should be able to get going!
Showing posts with label Art. Show all posts
Showing posts with label Art. Show all posts
Thursday, February 23, 2012

Saturday, December 25, 2010
Homemade Snow Globe
What says the holidays more than a nice old fashioned snow globe? Even better would be one with a special place in it. So I thought, why not make a snow globe with a model of my house in it?
Supplies:
I got the snow globe kit from snowdomes.com. All the measurements are on their website, but the wooden base I received did not look like the one in their pictures. I took some pictures of my house for reference as I sculpted with the clay. I have read online to be weary of using paint, as sometimes it will degrade and make the water cloudy.
First step:
Make the basic shapes of the house. Then add a consistent layer of snow over the roof. Finally, I've found that adding some simple texture does wonders for the overall appearance. I used a small flat head screwdriver to add horizontal lines to the sides of the building where they is paneling.


Second Step:
Add the details. Windows were little black squares on top of slightly larger white squares. I used the flat of a knife to press the clay into very thin layers. Again, textures really help. I put a white layer on the base for the snowy ground.
Third Step:
Baking! The directions for clays will vary, but mine took about two hours to cook since the house was about an inch thick. The picture below with the pencil shows the scale.


Fourth Step:
Check to be sure that the stiff model still fits inside the glass dome easily. Then use epoxy generously to affix the model to the rubber stopper. I let it dry for several hours. Then invert the dome and fill it with snow and distilled water. I only used about half of the snow, because all of it seemed very overwhelming. Next squeeze the stopper in very gently. Once the overflowed water is dry, use more epoxy to seal the dome completely. When dry, invert and glue into the base. All done!

Supplies:
- Snow Globe Kit (glass dome, wood base, and snow flecks; I used a "Large" size)
- Distilled Water
- Glue (I used epoxy, caulk/tub sealant does NOT work - it makes the water cloudy)
- Colored Polymer Clay (Premo or other brand from Michael's, etc.)
- Beads?
- Other waterproof details
I got the snow globe kit from snowdomes.com. All the measurements are on their website, but the wooden base I received did not look like the one in their pictures. I took some pictures of my house for reference as I sculpted with the clay. I have read online to be weary of using paint, as sometimes it will degrade and make the water cloudy.
First step:
Make the basic shapes of the house. Then add a consistent layer of snow over the roof. Finally, I've found that adding some simple texture does wonders for the overall appearance. I used a small flat head screwdriver to add horizontal lines to the sides of the building where they is paneling.


Second Step:
Add the details. Windows were little black squares on top of slightly larger white squares. I used the flat of a knife to press the clay into very thin layers. Again, textures really help. I put a white layer on the base for the snowy ground.
Third Step:
Baking! The directions for clays will vary, but mine took about two hours to cook since the house was about an inch thick. The picture below with the pencil shows the scale.


Fourth Step:
Check to be sure that the stiff model still fits inside the glass dome easily. Then use epoxy generously to affix the model to the rubber stopper. I let it dry for several hours. Then invert the dome and fill it with snow and distilled water. I only used about half of the snow, because all of it seemed very overwhelming. Next squeeze the stopper in very gently. Once the overflowed water is dry, use more epoxy to seal the dome completely. When dry, invert and glue into the base. All done!

Sunday, October 31, 2010
Finished Star Wars Battle Droid Stencil


I used some ziplock bags with dry rice in them to use as weights. Alternatively you could use sand or dirt to fill the bags. Even though there wasn't much wind, just the occasional breeze was enough to disturb the stencil.

The white layer turned out pretty well. It did take a lot longer to dry than I had anticipated, probably because it was done in the shade and not in the sun. I just left it alone for about an hour until I came back to do the next layer.

Alignment of the second layer took a lot of time to get just right. Especially the smaller pieces which required a substantial use of double-sided tape to get to stay in the right places. In the end though I was very satisfied with the results.

Things to change for the future when using shower curtain stencils:
Make sure to store them in a rolled position even though they were initially folded when bought. The creases make thin sections impossible to lay flat. Also pick designs that have more connected spaces. Sections of curtain that extend like peninsulas don't stay in place very well at all.
Still overall it's a phenomenal success!
Saturday, October 30, 2010
Making A Star Wars Droid Stencil

I designed this droid stencil to have two layers, a bottom white layer and a top black layer. The composite should look something like the image above. I made this stencil out of a shower curtain that I had planned to use with the aeroponics system, but it had gotten replaced by roll down windows blinds instead.
After using some software to poster print the design, I taped together the pages and laid them on top of the flat shower curtain. Using a sharp exacto knife, I cut through the paper and the curtain along the outline.

Once all the scrap paper and curtain was removed, I was left with a stencil like the picture below. Note that in each leg there is a branch that connects to the white section between the legs. The two branches will not show up in the final design because they are in sections that will be completely covered with black.

The black layer contained all the details and was more complicated. The pictures of the black layer are below.


Tomorrow I'm going to try stenciling it outside with some homemade spray chalk.
Wednesday, August 25, 2010
Koi Stencil Design

After printing out my scanned in design with the help of a Rasterbator software, I trimmed and taped them all together.
Next I laid out the thin sheet of plastic and traced the pattern with a sharpie.


As I have to get up at 8 tomorrow, I won't work on it more tonight. Thursday I will be cutting it out with scissors or a razor blade. I sure hope the plastic is thick enough to keep its shape once cut, or else this will be a lot of wasted effort.
Tuesday, August 17, 2010
Large Footprint Stencil

Using spray chalk (basically powdered chalk and water in a spray bottle), a large footprint stencil I made a few months ago, and help from my friend Ben, there are now giant footprints in Blacksburg.
The stencil was made from a footprint image online, although I suppose I could have made my own with some paint and my foot. The material I used was "Polycarbonate Film Textured Finish, 24-1/2" x 48-1/2", .005" Thk, White" on McMaster (Item #85585K92). I used a sharpie to outline the pattern and scissors and an exacto knife to cut it out.

The polycarb sheet rolls up nicely (I used some newspaper to roll with it though since there were fragile parts) and lies out flat. I used weights on the corner because there was a slight breeze.

For comparison of size, we decided to do my footprints nearby with my regular stride length. I sprayed the bottom of my foot with pink spray chalk and immediately stepped down. The foot was visible, but not very bright. So Ben followed me and used a regular stick of chalk to go over where my foot had pressed down.

And just for fun, the pink footprints terminate at a short wall. Using the stick of pink chalk to outline the butt of my pants and then using the same print-and-draw technique from the footprints for the hands, we managed to resemble a sitting impression. We tried to arrange the footprints below it in such a way that it was believable a person could have hopped up into the sitting position.


Between us it took about 2 to 2-1/2 hours to finish everything. The stencil was a little hard to carry once unrolled, but perhaps having more overhang around the edges or using a slightly thicker film would help. In the picture below you can see some over spray, but on all the other feet, we were careful and there was almost none at all.


Saturday, August 14, 2010
Packaging Tape Sculpture (top)
Alright, finished the torso! Did a full three layers around the chest and only did two layers around the arms. Make sure to do two layers, because only one layer will crinkle.


Alright next was the challenging step of combining the bottom and top parts. I learned that even though the torso was triple-layer, the hips should have been triple-layered too because the hip section didn't support the torso very well. Anyway I put a lovely smiley balloon for a head instead of casting a person's head for fear of suffocation risks.

I also added a nice treat with two strings of yellow Christmas lights. Putting them inside before taping them up definitely a good idea though! Anyway below are some pictures. The first is with a flash, and the second is without a flash so you can see how bright it looks.


Alright next was the challenging step of combining the bottom and top parts. I learned that even though the torso was triple-layer, the hips should have been triple-layered too because the hip section didn't support the torso very well. Anyway I put a lovely smiley balloon for a head instead of casting a person's head for fear of suffocation risks.

I also added a nice treat with two strings of yellow Christmas lights. Putting them inside before taping them up definitely a good idea though! Anyway below are some pictures. The first is with a flash, and the second is without a flash so you can see how bright it looks.


Friday, August 13, 2010
Packaging Tape Sculpture
So after seeing the work of Mark Jenkins and the likes, I decided to make my very own packaging tape sculpture. The ultimate plan is to make people - or maybe birds - and light them from the inside and then place them up in trees in a public place. During the day they would seem like ghosts climbing trees. At night they'd become glow-people. Perhaps I could buy some of the $3 solar garden lights and use those so there wouldn't be any pesky extension cords for people walking by to unplug.
Anyway onto what I've done so far. My sister has sportingly agreed to be my mold. I have only done half of her at a time to allow the skin to breathe properly. Even so, it is important to be quick and not to cut off circulation.
First, cover the model in saran wrap. This was my first time so I only did one layer. If using a doll or some other inanimate object that might be fine, but with a person it's probably a good idea to use two layers. Make sure to keep it loose or it will be difficult to get off!

The next step is to cover the saran wrap with clear packaging tape. It was very hard not to miss anywhere, so I put on two layers. This was fine for the ankle and calf area, but around the thighs it might have been a good idea to use three or four layers for extra structural support.
Once all taped up, it's time to carefully cut it off.

After it's cut, carefully have your model step out. What is left is a hollow structure. Do not fear if it looks misshapen.

Now start at the toes or other small ends and use short strips of tape to carefully line up the edges where it was cut earlier. Taping up the edges will add a lot of structural support. I taped up a little past the hips so that when I do the torso later I will have some overlap where it combines. Below are some shots of the finished bottom half.


Anyway onto what I've done so far. My sister has sportingly agreed to be my mold. I have only done half of her at a time to allow the skin to breathe properly. Even so, it is important to be quick and not to cut off circulation.
First, cover the model in saran wrap. This was my first time so I only did one layer. If using a doll or some other inanimate object that might be fine, but with a person it's probably a good idea to use two layers. Make sure to keep it loose or it will be difficult to get off!

The next step is to cover the saran wrap with clear packaging tape. It was very hard not to miss anywhere, so I put on two layers. This was fine for the ankle and calf area, but around the thighs it might have been a good idea to use three or four layers for extra structural support.
Once all taped up, it's time to carefully cut it off.

After it's cut, carefully have your model step out. What is left is a hollow structure. Do not fear if it looks misshapen.

Now start at the toes or other small ends and use short strips of tape to carefully line up the edges where it was cut earlier. Taping up the edges will add a lot of structural support. I taped up a little past the hips so that when I do the torso later I will have some overlap where it combines. Below are some shots of the finished bottom half.


Tuesday, June 15, 2010
Fence Chalk Art

Here's some fun chalk art I've been up to! It should wash off in a few days, I just put it up on the old farm fences behind my house.


These are just a few pictures. I plan to go out again later, but maybe to a different area and chalk more inspirational things. Everyone deserves a little pick-me-up from time to time. I just hope I could make someone smile.


Full Color Stencils

I enjoy stenciling because of the strong contrast. However, working in just one color gets boring! So multilayer stencils are neat because you can get a few colors. Any more than just a few though, and it becomes much more complicated and isn't quite as effective.
Here are two examples of stencils I've done in the past. To the right is a single color stencil that I cut out of posterboard and did in spray chalk on the sidewalk.
I wanted a method that would convert a full color picture into three simple stencils. I found one pretty good site with instructions here. However, I do not have a laser cutter, or Adope Photoshop. What I do have, is a copy of MATLAB! So, I wrote a script to separate the layers and use various sizes of squares to represent the brightness in a certain area.
A good test was to use a color wheel. Below is the original and my recreated version. Click on the thumbnails to see the higher resolution.

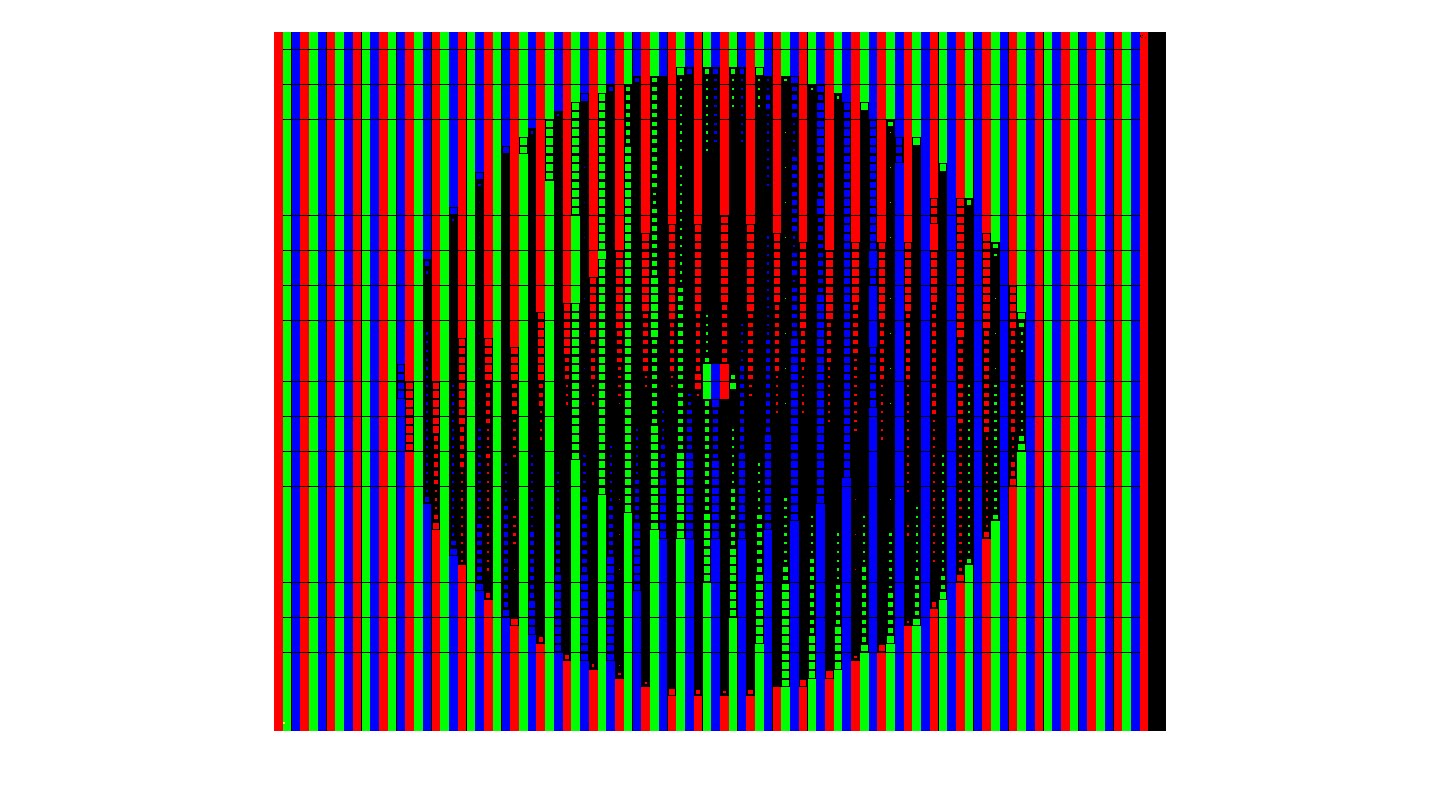
As you can see, the new one looks much darker. However, when it is blown up, it is much brighter than it seems in this thumbnail. This created image was set to only have four sizes of square used. This means things don't blend as well, but will make construction of the stencils much easier.
Subscribe to:
Posts (Atom)