Saturday, December 25, 2010

Homemade Snow Globe

What says the holidays more than a nice old fashioned snow globe? Even better would be one with a special place in it. So I thought, why not make a snow globe with a model of my house in it?

Supplies:

  • Snow Globe Kit (glass dome, wood base, and snow flecks; I used a "Large" size)
  • Distilled Water
  • Glue (I used epoxy, caulk/tub sealant does NOT work - it makes the water cloudy)
  • Colored Polymer Clay (Premo or other brand from Michael's, etc.)
  • Beads?
  • Other waterproof details

I got the snow globe kit from snowdomes.com. All the measurements are on their website, but the wooden base I received did not look like the one in their pictures. I took some pictures of my house for reference as I sculpted with the clay. I have read online to be weary of using paint, as sometimes it will degrade and make the water cloudy.

First step:
Make the basic shapes of the house. Then add a consistent layer of snow over the roof. Finally, I've found that adding some simple texture does wonders for the overall appearance. I used a small flat head screwdriver to add horizontal lines to the sides of the building where they is paneling.


Second Step:
Add the details. Windows were little black squares on top of slightly larger white squares. I used the flat of a knife to press the clay into very thin layers. Again, textures really help. I put a white layer on the base for the snowy ground.

Third Step:
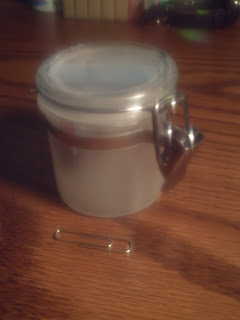
Baking! The directions for clays will vary, but mine took about two hours to cook since the house was about an inch thick. The picture below with the pencil shows the scale.


 Fourth Step:
Check to be sure that the stiff model still fits inside the glass dome easily. Then use epoxy generously to affix the model to the rubber stopper. I let it dry for several hours. Then invert the dome and fill it with snow and distilled water. I only used about half of the snow, because all of it seemed very overwhelming. Next squeeze the stopper in very gently. Once the overflowed water is dry, use more epoxy to seal the dome completely. When dry, invert and glue into the base. All done!

QR Code Double Knit Potholder


     Have you ever been ready to cook, but not known what to make? Presenting the QR potholder! Just point your phone at it and it will direct you to a website full of recipes. Then when you need to take the food out of the oven, the potholder is right on hand.

     This potholder features double thick knitting, with an inverted image on the reverse side. I already checked, the reverse side does not scan. Oh well.


     Because this knit was a little more rectangular than I cared for, I used some creative felting and washing techniques to try to stretch and shrink it to a square. I put the potholder in a pillowcase and then in the wash. Once soaked and spun a bit, I took it out an pinned it against some foam in the shape I wanted.


     After it dried, it kept the square shape pretty well. It is nice and thick and works well as a potholder and the QR code gives a nice easy way to access recipes.

Aeroponics Deconstruction

     As I prepare for my trip to France, I have to get ready to move most of my stuff back into my parents' place. This includes taking apart my aeroponics setup for transport. This is the first time I've taken apart the system since I set it up. I ran across several surprises.

     First off, I think some of the plants did develop a little root rot. Particularly the onion plants which had no root really to speak of. Second, the roots of many of the plants extended too far! They grew all the way down into the water reservoir, removing any control I had over their nutrition or water uptake. Maybe it would be a good idea to have a separate tank for the water/nutrient solution.

     Another surprise was how dirty the water had gotten. None of the sprayers were clogged and there was no trouble with the pump, so the pump filter must have sufficed.

 
      Since it was dirty, everything needed to be cleaned. I started out by cleaning out the net pots. Those were easy enough. I dumped out all the clay pellets into a bucket (strands of roots and all) and used a scrub brush in the sink to wash off the pots.


     Next, I had to clean out the clay pellets to use again. The problem was how to get the little root hairs off the pellets, without having to do it all by hand which would have taken ages. I tried boiling all the pellets in a big pan. I got the heat up to boiling and then stirred the pellets often. I hoped that the roots would boil down into a pulp like spinach does in order to clean off the pellets. Unfortunately it didn't work! I just had a lot of warm, root-covered clay pellets. Hmm... I think a strong garden hose and some 1/4" wire mesh would do wonders.


     One pleasant discovery was two carrots. They grew pretty well for not being in soil. I washed them off just to get off any excess nutrients, but besides that, no dirt to scrub!


Sunday, October 31, 2010

Finished Star Wars Battle Droid Stencil

Star Wars Battle Droid Stencil Art

I used some ziplock bags with dry rice in them to use as weights. Alternatively you could use sand or dirt to fill the bags. Even though there wasn't much wind, just the occasional breeze was enough to disturb the stencil.


The white layer turned out pretty well. It did take a lot longer to dry than I had anticipated, probably because it was done in the shade and not in the sun. I just left it alone for about an hour until I came back to do the next layer.


Alignment of the second layer took a lot of time to get just right. Especially the smaller pieces which required a substantial use of double-sided tape to get to stay in the right places. In the end though I was very satisfied with the results.


Things to change for the future when using shower curtain stencils:

Make sure to store them in a rolled position even though they were initially folded when bought. The creases make thin sections impossible to lay flat. Also pick designs that have more connected spaces. Sections of curtain that extend like peninsulas don't stay in place very well at all.

Still overall it's a phenomenal success!

Saturday, October 30, 2010

Making A Star Wars Droid Stencil


I designed this droid stencil to have two layers, a bottom white layer and a top black layer. The composite should look something like the image above. I made this stencil out of a shower curtain that I had planned to use with the aeroponics system, but it had gotten replaced by roll down windows blinds instead.

After using some software to poster print the design, I taped together the pages and laid them on top of the flat shower curtain. Using a sharp exacto knife, I cut through the paper and the curtain along the outline.


 Once all the scrap paper and curtain was removed, I was left with a stencil like the picture below. Note that in each leg there is a branch that connects to the white section between the legs. The two branches will not show up in the final design because they are in sections that will be completely covered with black.


The black layer contained all the details and was more complicated. The pictures of the black layer are below.


Tomorrow I'm going to try stenciling it outside with some homemade spray chalk.

Monday, October 25, 2010

Sugar Snap Pea Pods


So far I have discovered four pea pods. There are still several blossoms left and even more budding. I'm so excited to have some home grown sugar snap peas for the first time in years!

Friday, October 22, 2010

Sugar Snap Pea Blossoms!


About a half dozen to a dozen flowers and flower buds seem to have shown up almost overnight. I did some research about how to pollinate sugar snap peas, and it appears they can either be cross bread or self-pollinated. As I only have one type of plant anyway, self-pollination is the best. It is even ideal.


Tuesday, October 19, 2010

New Watering Scheme's Effect


 I was out of town for a few days and before I left I changed the watering scheme for the plants. Previously the plants had been watered four times during a 14 hour day, for five minutes at a time. The plants were looking dry (the leaves were wilted and brownish). Initially I had thought the problem was nutrient concentration and changed the solution. Unfortunately, that only prolonged the real problem of dehydration.

So the new program waters the plants for eight times during a 14 hour day, for two minutes at a time. The reduced water time is because the roots are saturated rather quickly, and after that point, additional spraying doesn't increase the water coverage.

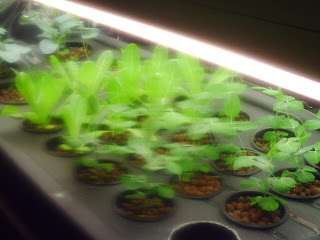
When I arrived home I saw the plants were doing very well! The lettuce, which was particularly effected by the water shortage were now huge.


A particularly large lettuce plant was stunting the growth of nearby lettuce plants. This indicates that the plants are too close together at this size. I rearranged the lettuce plants to have as little overlap as possible. I plan to eat the outer leaves of the largest lettuce plants so that they all stay a reasonable size. I'll try to keep the plants as big as the lower two in the picture below or smaller.


The rest of the plants are also doing better. The peas are still floppy, and I forgot to pick up some stiff wire mesh to make cages out of for them. The broccoli and cauliflower plants look very strong and the stems are pretty tough. I expect it will still be quite a while until flowering though judging by the thickness of the stalk when they're sold in stores compared to the current thickness.


Sunday, October 10, 2010

Mini Sun Jar


Here are the insides of my sun jar. It's very simple, a light sensor, a battery, and an LED. There are leads for a solar panel but it was slightly too big to fit in this tiny plastic mason jar.


To frost the plastic I used some Matte Finish spray paint which I had lying around from the packaging tape sculpture project. The pictures below show the difference between an unlit jar and a lit jar.Note: the dark spot is electrical tape and either will be removed or replaced with white electrical tape so it doesn't show up.


Right now it works, but I would like to integrate the solar panel and use a warmer colored LED to make it glow yellow instead of white.

Friday, October 8, 2010

Knit QR Code Potholder Pattern


So far I have found only two websites that have finished a knit QR code. Both used very fine yarn and several stitches per pixel. I found a hand knit QR code here. The other one was embedded in a scarf and was made with a computerized knitting machine here. Both have more square-looking pixels than my pattern. My pixels make more of a "V" shape because each pixel is only one stitch. Even so, it reads just fine. I intentionally did not put that much data in this code because I wanted to be sure it would work before making anything bigger.

I downloaded some software both to create and read QR codes on my computer. It is freeware and can be downloaded here.

Once you've created the desired QR code, you can print out the picture and number the columns and rows to make following the pattern easier.

The number of pixels across the pattern is will determine how big the pot holder/knit pattern will be. My code was 25 pixels across and I made a 5 stitch border all around, so I started by casting on 35 stitches in white. Remember the white border is important for the code to be read properly.

After cast on, alternate knitting and purling each row until you've worked 8 rows. Now the white border is done.

The next row should be a knit row. Knit 5 stitches in white and then start the first row of the QR code from left to right. Knit 5 more stitches to reach the end of the row.

The next row should be a purl row. Purl 5 stitches and then the second row of the QR code from RIGHT TO LEFT. Purl 5 more stitches to reach the end of the row.

Continue this procedure until the whole QR code is knit. Knit and purl 8 more rows in white to finish the white border. The black outline was done by knitting on a three stitch I-cord. Directions on how to do this are found here.

I did color changes by running the old color along the back of the work until it was used again. This means the back of the work looks like this:


There is a way to double knit so that two layers of fabric are made and all the tails are in the middle and out of sight. I have yet to try this technique.

Thursday, September 30, 2010

Roll-up Blinds


Previously I used a shower curtain with reflective coating attached to block and reflect light from the aeroponics unit. Unfortunately that meant it was a real pain to access the plants even though I could lift up the curtain from the lower right and clip it to the top of the shelves. Now I have invested in two roll-up window blinds.

Both blinds needed to be trimmed to size. The curtain itself could be cut with scissors. The hollow steel rod could be cut with a handsaw or band saw. I took about 10" off each curtain, one originally 53" and the other originally 24".


A roll-up blind on the front and on one side provide more than adequate access to the plants, lights, and electronics. The remaining two sides were covered with a permanently mounted shower curtain with reflective film. About four inches of overlap around the corners helps keep the light in.


Now I have perfect access to the growing plants! I apologize for the unfocused pictures, my camera has started acting very strangely. I'll try to get it fixed before I work on more projects.


Saturday, September 25, 2010

Bite-size Garlic Baked Potatoes


I bought some small potatoes at the super market a while back. I've decided to bake them. First I coated them in some vegetable oil and poked them with a fork to let out steam as it cooks. Next I rolled them around in some garlic and Greek seasoning.


The next step is to wrap it in tin foil. I cut a piece that was maybe 5-6" long. Put the potatoes in line vertically on the foil and then folded it in half long ways. Curl up the edges over themselves to make a good seal. Next twist once or twice between the potatoes to seal each one individually.


Now it looks like a little snowman! I preheated the oven to 400F and put the foil pods right on the rack for about 25 minutes.


To be sure they were done I pulled them out of the oven and tried pressing on the potatoes through the foil with the back of a spoon to see if they were getting soft.They cooled off pretty quickly and I just untwisted the foil.


Voila! Yummy bite size potatoes.


They were good when they came out... buuuut why not make it better? I melted some Parmesan cheese, mixed it with a little garlic, cut open a slit in each potato, and put a bit of cheese inside. Delicious!